
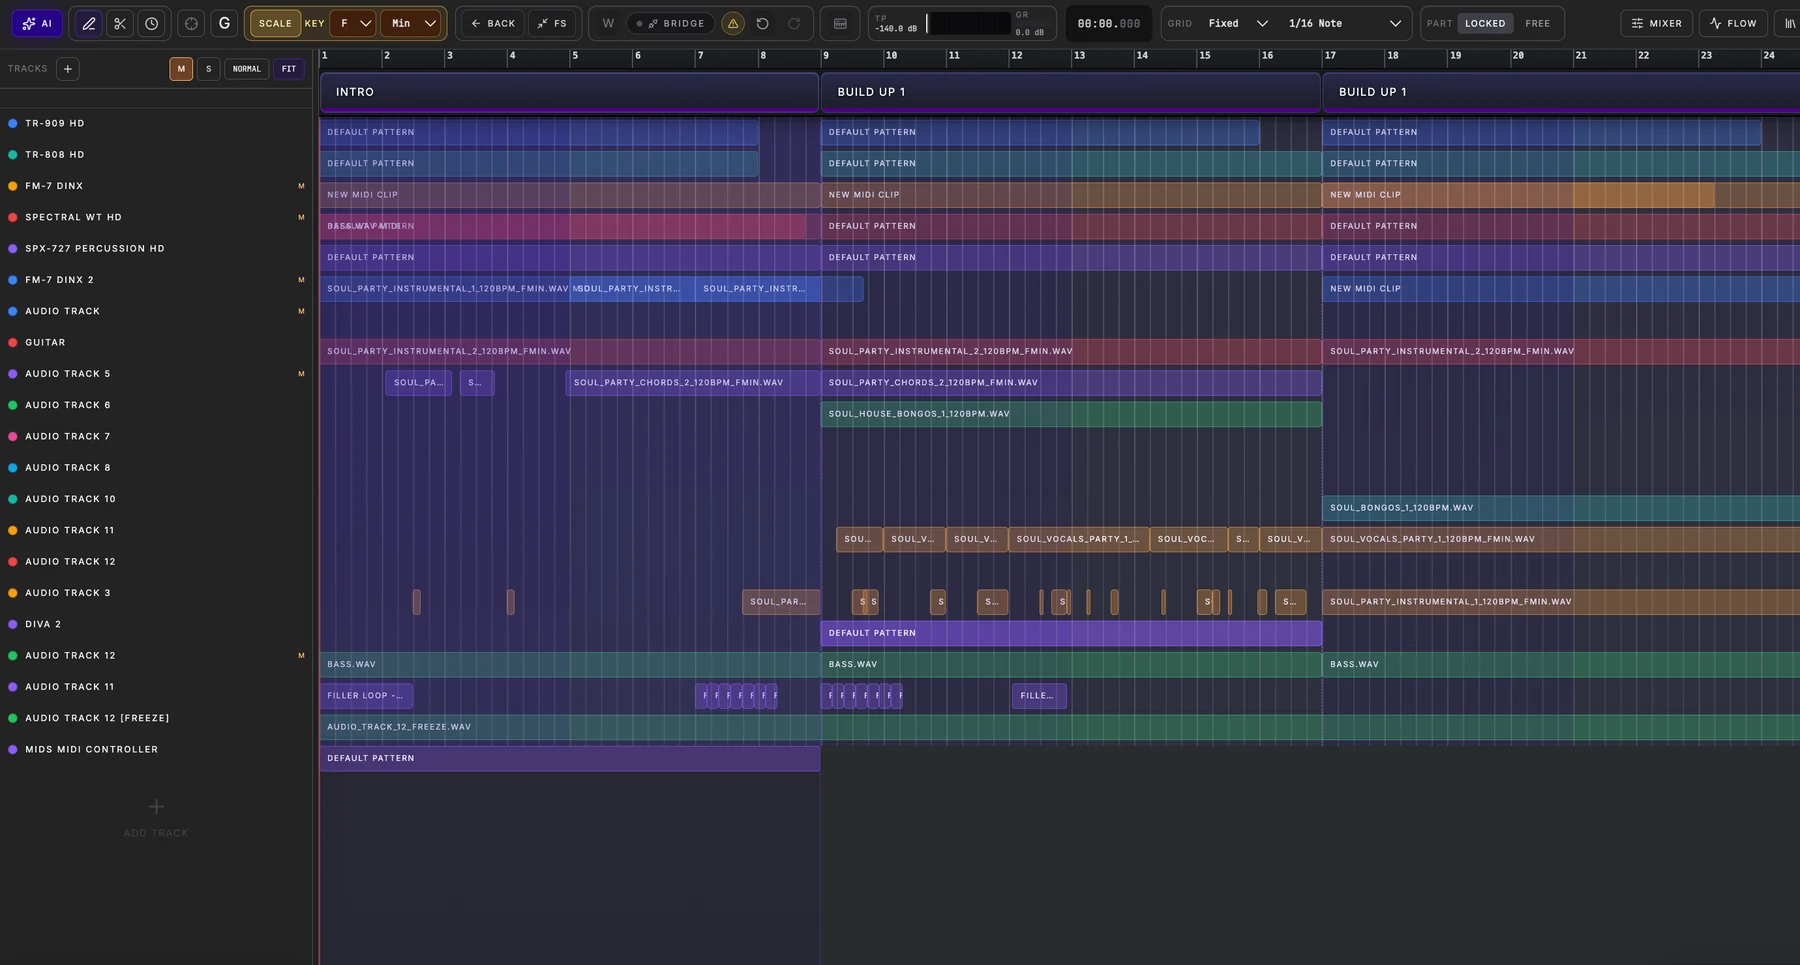
From sections to a timeline
Arrangement is where a musical sketch becomes a track with a beginning, movement and payoff. Song Parts show the larger structure across the top. Below them, each track carries the MIDI or audio clips that make the section audible. That lets you see both the song-level decision and the exact source material behind it.
Because Studio Flow can author the active Part directly, a producer can begin with a looping section and then move to the timeline without duplicating the notes. This matters when a pattern changes: the clip editor and Arrangement are views of the same musical truth, rather than competing copies of a sequence.
Edit across musical scales
Use the timeline for placement and development. Move or duplicate a clip to create a response. Change its length to expose a different phrase. Reorder tracks to keep the project readable. Open a MIDI clip when velocity, note timing or harmony needs attention, or an audio clip when the recording needs trimming, fades, gain, transpose or Warp work.
Automation follows the same principle. It belongs to the point in the arrangement where it should take effect. A volume move, filter change or effect parameter change can be inspected in the timeline alongside the clips it shapes.
Keep the editor honest
A production timeline is only useful if it reflects what plays. Spider’s intended rule is simple: MIDI in the clip editor is the same MIDI shown in Arrangement; audio edits are non-destructive clip edits; and track routing remains explicit. When you need to write quickly, start in Studio Flow. When you need to shape recorded sound, continue in audio editing.